September is here and that means it's time to get organized and ready to teach. Sometimes it can seem overwhelming because there is so much to do. In this blog post, I'd like to share with you four awesome organization ideas that can help you prepare for the fall. I've also included some free downloadable files.
#1 Using an iPad (or other device) for Scheduling

There are so many different devices available with built-in calendars. If you haven’t done so already, now may be the time to embrace some of that new technology. I can only comment on Apple products because that’s what I have been using. My iPad has really changed the way that I organize my teaching schedule. The calendar works so much better than my previous hand-written sheets. Here are some of the advantages of this amazing tool.
- You can set up your teaching schedule for the fall (lesson times and students). Once you have entered a student in the first week, you can have that event repeat throughout the year. Just make sure you go through the calendar and delete the lessons from the holiday weeks!
- You can colour-code the entries. I use different colours for regular lessons, missed lessons, part-time lessons etc. (You'll have to delete that week's repeating entry and re-enter it if you want to change colour). As with any app, there's always a learning curve as you try to adapt the program for your own needs. But I can tell you from experience, it's well worth the effort!
- At the beginning of each lesson, you can set an alarm to sound when the lesson is finished (with a 5-minute warning). This really helps you to stay on time.
- You can add comments to specific lessons using the notes at the bottom of each event (i.e. reasons for missed or changed lessons)
- Lessons can easily be moved around making re-scheduling a breeze.
- The search function is fantastic. In an instant, you can see all the lessons for one student for the entire year.
- The entire calendar is backed up in the cloud, so you won’t lose any information.
- The calendar on the iPad syncs through the cloud with any of your other Apple devices.

#2 Studio Events Calendar
Another great tool is my one-page Yearly Studio Calendar. You can use the same chart each year. Just change the dates and add all the important information that your students and parents need to know for the whole year (i.e. master classes, recitals, festivals, holidays, deadlines, exams, upcoming events, vacations, etc).
This Calendar can be e-mailed to your parents. I place a copy of the Calendar on the bulletin board in my waiting room. I also tape a copy in the back of each student’s Organizer so that we can refer to it at their lesson throughout the year.
This year, I have 3 PDF fillable versions of the Yearly Studio Calendar to share. All you have to do is download the file you want and then add the information for your own teaching year.
File #1 - Studio Calendar with all RCM (Royal Conservatory of Music) dates and Canadian holidays.
File #2 - Studio Calendar with Canadian holidays only (for teachers who do not use the RCM system).
File #3 - Studio Calendar with US holidays only.
 Note - PDF Fillable files that are sent by e-mail need to be opened with a program that reads the filled-in information such as Adobe Reader. Some e-mail programs will not show the filled-in information, however the information is still there.
#3 Yearly Student Performance Tracking Chart
I would also like to share my very handy ‘Student Performance Tracking Chart’ (Excel file) for organizing student performances throughout the year. You can add the student’s names plus all the dates for master classes, recitals and other performances. Then print this file and put it on a clipboard in your studio. This chart can then be used for performance planning throughout the year for your entire class.
You can add pieces (in pencil) to the chart as they are chosen throughout the teaching week. I find that it’s faster in the lesson to work with a paper copy. Every 2 weeks or so, you can update the chart on the computer and print it again. That way, you'll know exactly what is being worked on for performances at all times. There's a special column in the chart for keeping track of total playing time for some of the pieces. This is useful when it comes to timing recitals, competitions or master classes.
Here's the original file for my Student Performance Tracking Chart. You can download it and then add the names, dates and events from your own studio. I've also included 11 other worksheets for master class and recital program planning (see tabs at the bottom of the downloaded excel sheet).

#4 The Student Music Organizer - The Complete Dictation Book
Here are some of the benefits of using the The Student Music Organizer:
- Saves time in a lesson. The book is so easy to use….all you have to do is fill it in and it’s designed to last for the entire year.
- 8 1/2 x 11” format - there's lots of room for writing on each lesson page. Manuscript is also included at the bottom of each page.
- Some sections included: Goal Setting, Favourite Pieces, Exam and Practice Planning.
- Lots of History Reference Material: Composer Chart, Summary Sheets for Musical Time Periods (Baroque, Classical etc).
- Also includes Music Dictionaries (with terms grouped according to style, speed, touch, etc), Basic Music Theory Reference Guides and a very handy Comparative Fingering Chart for keyboard scales.
Organization is the key to having a well-run studio. My students and parents especially appreciate it when they know exactly what is happening throughout the year. With a little planning ahead of time, you can sail into the fall knowing that everything is ready to go.
♥︎ Remember - Great Music Comes From the Heart ♥︎


Piano Photo by Miki Yoshihito
Fall Photo by Darlene Irwin

Do you send out a Music Studio Newsletter at the beginning of the teaching year?
Well, if you don’t, then maybe this year is a good time to start! Communication is the key to running a successful music studio. Having your own Music Studio Newsletter is a great way to kick off the teaching year in an organized and professional way.
I know....you are probably wondering....where do I start?? In this blog post, I’d like to give you some quick and easy ideas on how to effectively write your own Music Studio Newsletter. A simple letter format works best for me because I have quite a bit of information that I want to share and I need the extra room. However, if you are feeling creative, you could also use a fancy template that allows you to add pictures to give your newsletter a little more punch. Programs like Word or Pages have sample Newsletters that you can easily adapt for your own use.
Planning Steps for Writing Your Music Studio Newsletter

Organize your Information Before You Start to Write
-
Plan your teaching schedule well ahead of time. How many weeks are you teaching during the year? When are you taking holidays? When do lessons end for the year? Parents need to know this so they can plan their own holidays.
-
Set dates for your important events such as master classes and recitals. Parents can add these events to their calendars at the beginning of the year. Students are more likely to attend if they know the dates well in advance. Make sure that you have all other important deadlines and dates for things like exams, auditions and festival classes.
Start with a Friendly Introduction
-
Begin by welcoming all returning and new students. You can also highlight any new programs or activities. Be enthusiastic….let your students know how excited you are to see them again.
Explain Studio Programs or Incentives
Highlight Student Accomplishments
- Students and parents love to hear about the successes of other students in your studio. It helps to make them feel part of the group. Make sure that you have permission to share this information.
Review Policies and Procedures
Share Other Important Information
- Include other information such as teacher qualifications, specific requests i.e.wash hands before lesson, where parents should park, how you would like to be addressed by students, piano tuner information, what is the best way to contact you etc.
End on a Positive Note
-
Your newsletter can help set the tone for the entire year. It also helps to avoid miscommunication and misunderstandings. Be positive, encouraging and excited about the upcoming year.
Include a One-Page Studio Calendar
-
A yearly studio calendar is a great way to keep everyone organized. I make a copy of my Studio Calendar for my students and then tape it in the back of their Student Music Organizer. That way, we can refer to it all year long.
Free Downloads
1) Click HERE to download the first style of Newsletter - a simple 5-page format without pictures or graphics. The file is an easy-to-use Word Document (doc). Feel free to copy, add, change, or delete whatever you like. Once your newsletter is completed, re-save it as a PDF file for mailing to parents and students. It's best not to send your original document file.
2) Click HERE to download a 6-page WORD template for a fancier Newsletter with pictures. It looks better, but there are a few of drawbacks to using this format. It's a little fussier to work with and it has limited writing space because of all the graphics. Even as a PDF, it's also a much larger file (6.1MB) . This is a consideration when you are sending your newsletter electronically.
In conclusion, I’d like to share with you a statement that I always include at the end of my Music Studio Newsletter.
“It is very important to me that your child enjoys their music lessons.
My primary goal as a teacher is to assist my students
to develop a love of music that will last for a lifetime.
Remember, teaching is like a triangle.
The parent and the teacher are at the bottom supporting the student at the top.
Working together as a team is the best way to ensure musical success.
I am looking forward to another exciting musical year together.”
Once you have completed your Studio Newsletter and Calendar, you can quickly and easily e-mail both files to all of your students. Parents will be grateful that you took the time to keep them informed and students will know what you expect of them throughout the year. Have fun writing your own Music Studio Newsletter.
♥︎ Remember - Great Music Comes From the Heart ♥︎


This year in my studio, I decided to try something completely different. This past spring, I hosted a
‘Music Enrichment Day’ for my students. This was not a competition, but rather like having a mini lesson with another teacher. Each student had the opportunity to perform two to four songs while I sat in the waiting area the entire morning so that I could encourage them and keep things running smoothly. Memorization was not mandatory, but it was encouraged. Our guest teacher was my friend and colleague, Frances Balodis.
My students participated for various reasons. Some wanted to gain confidence performing for another teacher. Others were preparing for an upcoming exam. Some just wanted to share their music and perform the best that they could. For some, it was their first time playing for another teacher. One brave adult student played 2 songs from memory. He was so proud of himself because he had not performed in many years and this was WAY out of his comfort zone!
My ultimate goal was for each student to continue to grow and develop as musicians.
Here are five tips to help you plan the best Music Enrichment Day ever:


Think Ahead
- Pick a date early. Let your students know in September that you are planning a special musical event in the spring. This year, April worked well because I had several students doing exams in June.
- I did charge a registration fee for this event. This gave me funds I needed to pay the adjudicator plus a little extra for treats and adjudicator awards.
-
All registration forms and fees were collected by the middle of February. Click here to download a fillable PDF Information Sheet and a also a Registration Form that you could use for your own Music Enrichment Day. Feel free to copy and change these forms to suit your own needs.
Finding the Right Person
-
Book the adjudicator early. Find a teacher in your area who shares your vision of teaching. I wanted someone who was competent, kind and understanding.
- You could keep the cost down by teaming up with another teacher and offering to listen to their students as an exchange.
Timing is Everything
- Know the length of each piece being played. This will help you to plan the day.
-
Allow extra time so that the adjudicator can work on one or two problem areas. My students loved the fact that they had a mini lesson with Frances. She took the time to demonstrate and even danced a Bourrée with one of them! Click here to download a scheduling sheet (Excel).
Make it Special

Have Fun
- Music Enrichment Day is a great idea, especially for students who feel intimidated or overwhelmed with a formal festival or competition. It's also excellent for those who are performing for the very first time. Above all, you want this to be a fun and encouraging experience for everyone.
My students had a great time. But you don’t have to take my word for it! Here’s what some of them had to say about our 2015 Music Enrichment Day:
- “I liked how she taught us different things that we could do with our songs”.
- “It was fun! It wasn’t stressful and I wasn’t scared. The lady was really nice”.
- "I really liked that she's a composer and I got to play a piece that she had written! It was very cool to know what her ideas and thoughts were when she wrote the song. She told me what she was imagining. It was amazing!
- “She gave us lots of great advice. I loved that it was such a comfortable feeling”.
- “This was my first time playing for someone else. I liked that she taught me something. It was fun when she showed me how to dance to my Bourrée”.
- “Miss Frances was really nice. She allowed us to let loose and play our best and she gave us great tips on how to improve our songs”.
- “I got to play in front of someone that I didn’t know. She helped me get ready for my exam”.
- “We got to work with an actual composer. She made me feel welcome”.
- “She liked my songs AND we got treats afterwards!”
- From a Grade 8 Student - “I loved how friendly she was. It wasn't intimidating at all and I instantly felt comfortable playing for her. Her passion for music was so obvious through her comments and excitement when she found out what songs I was playing for my exam. I thought it was a very encouraging event and made me feel more confident about my songs”.
And from my adult student (who also had 2 of his children participate).
- “We had an opportunity to get an unbiased 3rd-party view. It provided validation for what I was doing and for what my teacher was teaching. I also liked that we were expected to perform at a high level. This encouraged me to work hard. It was a great opportunity to perform with nothing on the line. The most important thing was that she was kind and encouraging to everyone”.
Music Enrichment Day is a great opportunity for students to perform their pieces for another professional in a relaxed, friendly environment. It's also a great way to help students gain performance experience and confidence. Frances was the perfect choice for an adjudicator. She was able to reinforce the things that I had been saying in my teaching. Repetition is always good, especially from another person! My student’s playing improved significantly after this event. In the end, everyone had a wonderful time sharing their music.
Have fun planning your own Music Enrichment Day.

♥︎ Remember - Great Music Comes From the Heart ♥︎


Exams…the very thought can strike fear into the hearts of many a student! But they can also be an important part of the musical journey. Successful exam preparation is a HUGE part of what we do as teachers. I often say that passing an exam is like opening a musical door. As a student completes an exam, he passes through that door and enters a whole new level of music.
There are many wonderful Conservatory systems offering graded exams for students. I use the Royal Conservatory of Music Examination (RCM) for my students. It’s a great way for them to logically and systematically pass through the various levels. This past year, 9 of my students completed their piano exams, ranging from Grade 1 to 8. All marks were 84% or higher. Several were 90% or higher including two Grade 7's with 92%. My Grade 8 played his exam just 2 weeks ago. He received 91%!
I would like to share with you some ideas that have helped me prepare my students for exams.
(Note....I'm giving away FREE mock exam charts at the end of this blog post).
KEY #1 BE READY

Are You Prepared for the Next Level?
- Moving too quickly through early grades can lead to discouragement later on.
- Students need to have the technical facility and sight reading skills before they start taking exams. This can take two to three years for a beginner.
-
Each student is different. Sometimes it's good to do a junior exam so that students become familiar with the process. Other times, it's better to wait until they are older and more mature. Some students need a certain grade for a school credit.
-
Exams are not for everyone. Some students enjoy doing recitals or master classes. Others prefer competitions. The most important thing is that they learn to love music. Find out what they like. Encourage them to do lots of different styles of music, including duets and trios.
KEY #2 GIVE IT TIME
Long-term Planning is Critical
-
Once a student is ready, it can takes 6-8 months to prepare for a junior exam (Pre Gd 1 - Grd 3). Intermediate exams may take an entire year. Senior exams usually take longer.
- All of this depends on how hard they work, how quickly they learn and how busy they are with family, school and other activities.
- Last-minute preparation leads to frustration for both the student and the teacher.
-
An effective learning technique that I use is....have students learn and memorize their exam pieces early in the year, put them away for a time and don't play them, then bring them back and perfect them.
- Have them play other pieces at the same time. That way, they don't get tired of their exam pieces.
-
Technique, Sight Reading and Ear Training are worth over 30 marks on an RCM exam AND they can't be crammed. Work consistently on these areas throughout the year.
KEY #3 PICK PIECES CAREFULLY
Strategic Piece Selection
- Try picking pieces that are in the syllabus but not in the current books. Students love to feel that they are doing something unique. It’s also refreshing for an examiner to hear something totally different.
- In the RCM system, you can replace one study with a Popular selection OR a ‘Teacher’s Own Choice’ (Grade 3 and up).
- Pick pieces that will highlight the student's strengths.
- Here are some interesting and varied pieces that my students have chosen recently. All of these pieces work well for exams.
Grade 3—
Shark (Teresa Richart) Study - Teacher’s Own Choice (Canadian Composer) from 'At Sea'
Grade 4—
Muskoka Autumn (Frances Balodis) Study - Teacher’s choice (Canadian Composer)
Grade 6—
Winter Scene (Boris Berlin) List C (Canadian Composer)
Grade 9—
Monarchs (Martha Duncan) List D (Canadian Composer) from 'Isla Vista Suite'
KEY #4 MEMORIZE IN SECTIONS
Don't Practice Until You Get it Right, Practice Until You Can't Get it Wrong.
Here's my Theory....there are 3 levels of memory for pieces
- You can play it at home, but it is still shaky at your lesson.
- You can play it at your lesson, but it is not yet ready for performance.
- You can play it for anyone because you know it inside out.
- Divide pieces into logical sections according to form and phrasing. Label them A, B, C etc.
-
Learn and memorize pieces Hands Separately (HS) and Hands Together (HT) in sections.
-
Be able to start at any section - RH, LH or HT (Safely nets throughout piece).
- Keep going in performance….jump to the next section if you must but NEVER go back.
- Practice 'jumping' while playing....student starts their piece, teacher calls out a section and the student must jump to that section and keep going!
- See our handy Sight Reading Memory and Performance Cards for lots of great ideas on Memorizing and Performance.
KEY #5 PERFORMANCE EXPERIENCE
The Importance of Performance Practice
- Perform each piece at least once in a master class or recital before the exam.
- Do a video of each piece before the exam. It's a great memory check because it simulates the exam experience.
- Have a special Exam Master Class about 3 weeks before exams.
-
Have each student perform their pieces, one after the other, as a concert group. There usually isn't time for studies.
Have a 'Scale-a-Thon' at the end of the class....here's how it works:
- Each student receives a small plastic bag.
- You will need the 'Scale Charts' or technique books for each grade and a bowl of M&M’s.
- Call a student’s name and a scale or triad from their grade.
- Students take turns running to the piano and playing their technique for each other.
- If they do it well, they can put an M&M in their bag. The goal is to get as many M&M's as possible.
- Before the class, students work harder on their technique knowing they are going to be playing them for others.
- After the class, the younger students work harder to improve because they've heard what the older students can do.
KEY #6 MAINTENANCE PRACTICE
Maintaining a Piece is Like Mountain Climbing
-
Students sometimes struggle to keep fast-paced pieces at performance level.
- Having a piece ready for performance is like making it to the top of the mountain. However, if you are not careful, it will start to slide down the other side! Jelly Fingers set in!
- Get out the musical ropes and pull that piece back up to the top of the mountain. What are the ropes, you ask? Why, the metronome, of course....he should be your best friend.
- Slow practice is really fast practice in slow motion.
-
You need to control the music....you can't let the music control you!!
- All fast pieces should have a maintenance speed. You can practice it up to speed as well...but only if you have paid the price with slow metronome practice.
- The fast speed should be a little under the suggested metronome speed. Adrenaline will take care of the rest! If a student has practiced slowly with the metronome, he should be able to control his piece in performance.
See my blog post on Maintenance Practice for more ideas.
KEY #7 ORDER MATTERS
Plan the Order of the Exam Carefully
In the RCM exam system, a student is allowed to chose the order of the exam (i.e. doing pieces or technique & studies first, order of studies, order of pieces).
Here is my preferred order for an exam:
- Start with technique. It should be well prepared...I have my students play their technique at the speeds of the next grade.
- Doing technique first gives them a chance to try the piano, settle into the exam, and warm up their fingers.
-
Studies will be next. They do not NEED to be memorized, but they should be anyway. Having the music as a 'security blanket' will take away the pressure of 'having' to memorize studies.
- Choose the order of songs so that they start and end with their strongest pieces. Alternate fast and slow songs for interest and variety.
- Ear Training and Sight Reading are always done last.
KEY #8 MOCK EXAMS WORK
Mock Exams - An Essential Part of Exam Training
- Do mock exams on the last 3 lessons before an exam. Students feel much more comfortable with the whole exam process by the third mock.
-
Pretend to be the examiner. Run through the entire exam exactly as it will be done on their exam day.....minimal cordial talking only, have them wait quietly while you write, no comments or feedback from examiner, only written comments. The first time that they experience this can be very unnerving.
- I use the graded Mock Exam Sheets (for sale on this website). They are fillable PDF files. I can write in them for the mock exam, save them and then e-mail the sheet to the student at the end of the exam. Each Mock Exam Sheet comes with a handy Percentage Calculation Chart.
- I do give them marks on their mock exam. I explain to them beforehand that I are not their examiner, that this is just one moment in time and that their mark can certainly change on the day of their exam. I usually mark harder than the examiner. I just want to make sure that they are in first-class territory (80%).
- You can ask your students to print their mock exam sheets and tape them into their Organizer for future reference.
A practical piano exam is made up of many different components….Technique, Studies, Pieces, Ear Training and Sight Reading. Preparing for a piano exam requires that all of these things peak at the same time. I like to compare an exam to a musical box….we add each of these prepared elements to the box one at a time until the box is full. Then and only then is the student is ready for their exam. Good luck preparing your students for their music exams.

♥︎ Remember - Great Music Comes From the Heart ♥︎

Photo credit: Alice's Door Knob, 7-2012
 The holidays are over and life is slowly returning to normal.
I’m sure that everyone is anticipating the return to teaching this week. I think that one of the biggest challenges teachers face is trying to keep students motivated and excited about practicing, especially after they have had a break from their normal routine.
I have several incentives in my studio to help motivate my students. Some of these have already been outlined in a previous blog post entitled “Stickers, Charts & Rice Krispie Squares—Strategies for Practice Motivation”.
My students record their weekly practicing on their assignment page in their Student Music Organizer. If they have met their practice goals, then they receive a special Sticker of the Week. They can also put a special sticker on the wall chart in the studio. And I have treat week every 5 weeks.
All of this helps to keep them on track with their goals. However, I was concerned that they weren’t always focusing on and completing their weekly assignments. And so I came up with a fun program that I called 'Reach for the Stars'.
This program works especially well with junior students. It’s important to note that it is not mandatory. I give each participating student a 'Reach for the Stars' Information Sheet explaining exactly what I require for each star. Some of the requirements may not apply to all students. For example, some students may not be yet working on technique. I take all of this into account when assigning stars.

Here’s how it works:
Each week, a student receives a coloured star at the end of their lesson. The colour they receive will depend on how well they have prepared for their lesson (SUPER GOLD, Gold, Silver, Blue or Red). I assign points to each coloured star and keep track of their scores throughout the year using a special 'Reach for the Stars' Tracking Chart. (Click here to download my original Excel file). I do not share their actual accumulated scores with each other.....this information is kept confidential. However, my students do know exactly what I expect from them each week because I write detailed notes in their Organizers.
I usually start this program in October after we’ve had a few lessons together. However, it works just as well starting in January and running until June. The important thing is that they are not competing with each other, but with themselves and how well they have prepared for their lesson each week at their particular level. That way a beginner has equal opportunity to receive a Super Gold Star if they complete their weekly assignments.
Here are the criteria for each star:

SUPER GOLD (20 points)
- A Super Gold star is saved for something amazing.
-
There has been an extra special effort.
-
Something has really impressed me.
- (Extra theory, pieces memorized, musical playing that gives me goose bumps)
-
A very organized, musical and well-prepared lesson.

Gold (15 points)
-
There has been a Special effort.
-
ALL assigned pieces are played VERY WELL. Some may be memorized.
-
Playing is excellent and musical.
- Theory is completed and well done.
-
Assigned scales are played well with correct fingering.
-
All required practice time is completed and noted on their chart (see Organizer).

Silver (12 points)
- There has been a very good effort, but not quite GOLD.
- Most assigned pieces are played well.
- Theory is completed.
- Assigned scales are good but still need some work.
-
All required practice time is completed and noted on their chart.

Blue (10 points)
-
There has been a moderate effort.
- Assigned pieces are better but some still need work.
- Theory is completed or almost completed.
- Assigned scales have improved but some still need work.
- Required practice time is completed or is almost completed.
- 1 point deducted if theory is not completed.

Red (7 Points)
- There has been some effort, but there is room for improvement.
- Most assigned pieces need more work.
- Theory may not have been completed.
- Assigned scales need more work.
- Required practice may not have been completed.
I have a very cool Musical Treasure Box in the studio filled with goodies. The Dollar Store is a great place to buy things for the Treasure Box. My Treasure Box was a gift from a student.....it looks like a musical book! This gives students an added incentive to try their best each week. Students can pick something from the Musical Treasure box each time they accumulate three gold or super gold stars (they don’t have to be in consecutive weeks).


At the end of the year I total all of their earned points. I then give Star Awards at the recital in June. First place receives a small trophy. I give ribbons for 2nd, 3rd, 4th and 5th place. I will give ties if the scores are close. Every student receives a participation ribbon.

'Reach for the Stars' is a fun way to start the New Year with a fresh and interesting approach. This program helps my students stay motivated. It also helps them gain confidence for upcoming performances and exams. They really try to accomplish what is expected each week. They think about what they are practicing instead of just playing something to fill in time and they strive for perfection in their work. In short, they start to find the music hiding in the notes!
Have fun trying something new in the New Year…..have fun Reaching for the Stars.
♥︎ Remember - Great Music Comes From the Heart ♥︎

Photo credit: "Star Walkers" by Paul Kline
It's December and preparations for Christmas are in full swing.

Last Friday evening, I held my annual Christmas Piano Recital/Musical Party. My students look forward to this event all year long. They started picking their pieces months ago. I have a rule that once you pick a piece it's yours...no one else can play it. One student has already picked her piece for next year.....The Bell Carol is certainly one of the most popular selections! They don't have to choose a Christmas song, but most of them did. One student decided to play Sonatina in G+ by Clementi. We both felt that this was a great opportunity for him to test his memory for an upcoming Grade 8 exam. (I did think of calling it The Christmas Sonatina…..maybe not!)
The recital was a huge success. All students were in attendance and everyone had a great time. Some used their music, some took the music up and didn’t even look at it and some felt brave enough to play from memory. The most important thing is that they were excited to share their music with each other.
This was certainly the case with my youngest student. She could hardly wait to play Jingle Bells with me. She has only had 11 lessons, but she already plays with confidence and she loved having the bells on her arm.

I'd like to share my six secrets for planning the best Christmas recital ever:
Be organized
I use an Excel sheet called 'Christmas Recital Planning Charts' to organize and prepare for my recital. The file contains several worksheets including the Initial Planning Chart, a Program Planning Chart, the Final Program Planning Chart and a Refreshment Sign-up Chart. I use the Initial Planning Chart to time the pieces before I put the program together.
I find it works well to have the students sitting together at the front of the hall. It helps to have numbers on the students' seats. That way, the students know where to sit and what order they play in. This facilitates the flow of the program.
Shorter is Better
Time the recital pieces! Parents and students will get restless if the program is too long. I find that 60-75 minutes works best…I call this a 'Father Friendly' recital. If you have lots of students, you could hold two separate events (Junior and Senior). My Christmas recital last Friday started at 7:00 and was over by 8:00.
Be Prepared
Make sure the students have 6-8 weeks to work on their pieces. Some students are able to get their songs up quickly...that's great. We can put those pieces on a shelf and work on something else in the meantime. However, most students require more time to feel comfortable performing in front of an audience. It's important that they also prepare mentally for their performance. They are not allowed to say the word nervous….instead I tell them that they are 'excited'…it’s a whole different feeling.
The Three Levels of Memory
This leads to my next point....pieces should be memorized. I don't require them to play from memory at the recital unless they feel at ease doing so. However, they will play so much better if their piece is memorized.
I have a theory about memory and performing. (My students know that I always have a theory about something!)
My theory is that there are three levels of memory.
Level 1: The first level is if you can play it at home, but not for me.
Level 2: You can play it for me but it is still not really ready for a performance.
Level 3: You can play it for anyone. Your piece is memorized in sections and you have many safety nets all the way through. I saw a quote on Facebook that went something like this - "Don’t practice until you can play it right. Practice until you can’t play it wrong!"
One of my students played Dance of the Sugar Plum Fairy by Tchaikovsky. We discussed the fact that it was written for the celesta. That led to the idea of performing it on her keyboard, which has a cool celesta setting.
Variety is the Spice of Life
Make sure that you have lots of variety. I love finding new and different arrangements of familiar songs. I place special numbers throughout the program and I list them in darker print on the program. This helps to keep the program interesting. Some of my students play other instruments as well. Last Friday, we had additional special performances with harp and voice, accordion, several duets and a fun keyboard piece. Here is an excerpt of What Child is This. The singer is a piano student who has never had formal training. She has a naturally beautiful voice that blended so well with the harp.
Make it Fun
Above all, the recital/musical party should be FUN. My students wouldn't miss it.....it is one of the highlights of our musical year. It is so important that this be a positive, enriching experience for them. Each Christmas, I make the traditional Piano Cake which is reserved just for them. After the recital, we had an informal social time with the parents supplying the rest of the refreshments. This also gave me a change to mingle, visit with their families and take pictures.

At their lesson this week I will ask my students what they liked the best about the recital….something other than the food! I know that they will be excited to share their favourite moments. We might even pick their piece for next year.
This Christmas season, my wish for all my students is that they develop a deep love of music in all its beauty and variety, that they learn to play this instrument we call the piano, that they learn to sight read well, that they gain self-confidence as they perform and that they continue to play, enjoy and share this wonderful gift of music throughout their life.

♥︎ Remember - Great Music Comes From the Heart ♥︎


Summer is a great time to relax and enjoy the nice weather. But for music teachers, summer is also the time to prepare for the fall. There is always so much to do before regular lessons resume. Organization is the key to having a well-run business. With a little planning ahead of time, you can sail into September knowing that everything is ready to go! That way you will spend less time worrying about all the things that you have to do and more time enjoying the time off. I would like to share with you a few great organizational ideas that have worked for me.
-
One of the first things that I do when preparing for the upcoming season is to work on my Yearly Studio Calendar. I have an Excel chart that I use to generate a one-page Calendar for parents and students. I can use the same chart each year. I just change the dates and add all the important information that I feel my students and parents need to know for the whole year (i.e. master classes, recitals, festivals, holidays, deadlines, exams, upcoming events, vacations, etc). In late August, I e-mail this to all of my parents along with a reminder of their first lesson date and time. I place a copy of the Calendar on the bulletin board in my waiting room. I also tape a copy in the back of each student’s Organizer so that I can refer to it at their lesson throughout the year and highlight any upcoming dates. I've included a link to my original file for the Yearly Studio Calendar in this post. That way, you can download it and change the information to suit your own teaching year.

- The iPad is an amazing tool. For me, it was definitely worth the investment. (See previous Blog Post called 'The iPad and the Music Teacher'). The Calendar App is one of the best studio organization tools on the iPad. I love how it backs up automatically to the cloud so that I don’t have to worry about losing my information. Entries can be colour coded to keep track of lessons that have been changed or missed. You can also write notes pertaining to a lesson directly on the individual entires. The search function is fantastic. In an instant, I can see all of the lessons for one particular student for the entire year. I also find the Contacts App very useful for keeping track of all student information. My iPad has revolutionized the way that I organize my business. Here's a link to help you get started. This article will help you with the basics of using the calendar App.
- I have a very handy ‘Performance Tracking Chart’ (Excel File) that I use to organize all student performances throughout the year. Once I’ve completed my yearly calendar, I set up this chart with student's names and dates of all master classes, recitals and other performances. Then I print it and put it on a clip board that I keep beside me in the studio. I can use this chart for performance planning throughout the year. In September, the first thing we do is pick a Master Class piece (for the end of October) and a Christmas recital piece. I will also use this to help plan performances for exam preparation. I can keep track of all performance pieces for all students throughout the year on these sheets. I find it easier to work with a paper copy in the studio. I can fill it in as I’m teaching. Every two weeks or so, I will update the chart on the computer with any changes or additions and print it again. This gives me a running list of all performance pieces being worked on by my students at all times. I also list the students' pieces in their own Organizer. There is a column in the chart for keeping track of the total playing time for pieces which is useful for timing recitals and Master Classes. Here is the original file of my ‘Performance Tracking Chart’. This will allow you to input the names, dates and events to suit your own studio.

-
The Student Music Organizer is another great time-saving teaching tool. Each September, my students start a brand new book. The book is written on 8 1/2 x 11” paper so there is lots of room for writing notes. It is is designed to last for an entire year of lessons so you don't have to buy 2 or 3 smaller notebooks. At the end of the year, you will have a complete record of what has been done for the entire year. Parents love it as well. If they have a question, I can tell them to check the Organizer! Here are some of the sections included in this great resource:
-
Goal Setting Section — I do this on the first lesson so that we know how to plan for the year.
-
Favourite Piece Section — This is very helpful when planning recitals, festivals or exams.
-
Exam Planning — for students doing an exam in the upcoming year, we start planning right away.
-
Practice Planning — after we have set goals for the year, we then decide together how much time they will need to practice each week to attain these goals. This time can then be broken down into smaller sections so they know how long to spend on each aspect i.e. pieces, technique, sight reading
-
The Organizer contains 35 Assignment Pages. These sheets can be filled out during the lesson. Each page contains a chart for recording weekly practice. There is also manuscript across the bottom and the pages are numbered so you can refer back to a scale or exercise assigned earlier in the year.
-
The back of the book contains lots and lots of valuable reference material. You will find extra manuscript paper, a composer chart, summary sheets for musical time periods (Baroque, Classical, Romantic, Impressionism and Modern), music dictionaries, basic music theory reference guides and a wonderful comparative fingering chart for keyboard instruments.

- ♫ A SPECIAL NOTE ♫…The Student Music Organizer Website is having a fantastic 15/15 sale! For the entire month of August, teachers will receive 15% off of their entire order if they order 15 organizers or more. Use the discount code AUGUST at checkout to take advantage of this terrific deal.
Have a great rest-of-the summer AND have fun getting organized for September.
♥︎ Remember, Great Music Comes from the Heart ♥︎

♥︎ Remember - Great Music Comes From the Heart ♥︎

Photo credit: "Over the River and Through the Woods" by garlandcannon

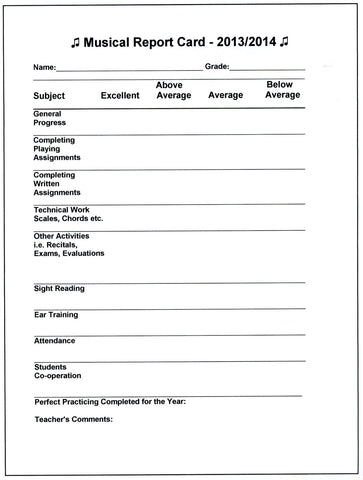
Musical Report Cards
The musical year is almost over.....time to look back and see what has been accomplished. My students really look forward to receiving their Musical Report Cards. This has been a tradition in my studio for many years.
A musical report card is a great way to give students a summary of what they have accomplished over the past year. It's also good for the parents to see the progress that their child has made.
Here are some ideas for using Musical Report Cards in your studio:
- Try to make the report card as positive as possible. Encourage, encourage, encourage!! Every student can usually receive an excellent grade in at least one area i.e. attendance, cooperation etc.
- I find it best to grade as excellent, above average etc. rather than give actual marks or A's, B's etc.
- I have a place on the report card to check if the student is what I call a "Perfect Practicer". (I will talk more about this program in a future blog post).
- I always write a few comments at the bottom of the report card. I usually include one or two areas that the student could improve on next year.
- I list all recitals, exams, master classes, auditions etc that the student has been part of throughout the year. That way, the report card becomes a summary of their musical accomplishments for the entire year. Parents especially appreciate this.
- The report card also gives the teacher an opportunity to summarize and review the entire year with the student at their last lesson. You could review their goals for the past year to see if they have met them. It's also a great time to start planning goals for next year.
I have included the original file for the Musical Report Card. You can use my design or personalize it for your own studio. You can easily add your studio logo or header at the top of the report card.
A Fond Farewell
June is also the time when we say goodbye to some of our students. I would like to recognize the accomplishments of two of my students.
The first student has been with me since 2007. She was a transfer student at the Grade 5 level. She completed her RCM Grade 9 piano with me last year with First Class Honours. This year, she has also completed her Basic, Intermediate and Advanced Harmony and her Basic History with Joe Ringhofer (Phoenix Conservatory). I'm very pleased that she has been accepted into the music program as a piano major at a well-known University in Ontario. I wish her all the best in her future.
Here is a video of her performing a beautiful piece entitled Monarchs from the Isla Vista Suite by Canadian Composer Martha Duncan. A big thanks to Martha for permission to post this performance. This piece is on the Grade 9 RCM list.
The other student that I would like to recognize started with me as a beginner when he was 10 years old. He also completed his Grade 9 piano last year (First Class Honours with Distinction). He is pursuing a career in Music Ministry and has been accepted into the music program at a well-known Bible College in the US.
I have included a video of him performing his amazing recital song—Prelude in c#- by Rachmaninoff.
Both of these students are amazing musicians and I will miss them.
Here is the latter student performing the closing number from my June recital with his brother. It was an entertaining and very funny performance of CS Theme and Variations by Randall Compton. (Published by Heritage Music Press).
♥︎ Remember - Great Music Comes From the Heart ♥︎

It's May and many music teachers are busy planning for their year-end recital. It can be a very busy and stressful time of the year. Along with the recital planning, there are also student exams plus preparing for next fall. I would like to share some of the effective ideas that I have used for planning, organizing and preparing for "The Perfect Recital".
-
Start planning early. Finding the best piece for each student takes time. They need time to prepare and hopefully, memorize their song. It's better to have the song up early and put it on a shelf for a few weeks then to be rushing at the last minute.
- Once a piece is picked, don't let anyone else play that song. Students love having their own 'special' song. Sometimes they even pick their song for the Christmas recital before the summer break!!
- Take care to choose pieces that showcase the student's strengths. Also keep in mind the level of difficulty. Try to encourage them to choose something that is a challenge but that they can reasonably perfect for the recital. It's so important that they feel good about their performance.
-
Timing is essential for a successful recital. The perfect length for a 'father friendly' recital is about 60-75 minutes. As a rule of thumb, each performance should not exceed five minutes. Of course, this also depends upon how many students are performing. Longer songs can be performed in a master class setting. If students are doing a piece that can be modified (i.e. a popular piece), then help them come up with an arrangement of the piece that is not too long, but will still showcases their playing. This is also a valuable skill for them to work on!
- Make sure that the students are well prepared. That way, the program will flow well. I don't require that they play from memory unless they are preparing for an exam or audition. However they will play better and with more confidence if their song is memorized. We work at memorizing the pieces in small sections, preferably hands separately! Then they can chose to use the music or not, depending on their comfort level. Some take the book up with them and never look at it! This helps to take the stress out of performing.
- Try to have a variety of fast and slow songs. Make sure that there are not too many slow songs in a row. It's also good to have a mixture of musical styles including classical and popular pieces.
- Spice up the program with a few special numbers. These pieces should be spaced evenly throughout the program. It's a good idea to list the performers and the piece on the program, but I like to surprise the audience by not giving the details of the performance. There is no need to have them announce their pieces at the recital if there is a program. This also saves time. Make sure each student has a copy of the program.
-
Pool your resources by involving musical parents or siblings. Maybe some of your students sing or play other instruments. A small choir or vocal ensemble is a fun addition. Try adding duets and trios. The special numbers for my upcoming June recital include two trios, two regular duets (one with a CD backtrack), one piano/harp duet and one piano/organ duet. We also have a student playing a harp solo and a parent playing accordion.
- It's important to keep parents in the loop when it comes to recital planning. I send reminders via e-mail at regular intervals. I also send an information sheet to each family about a week before the recital. This includes important information such as the student's seat number, the piece they are playing, any special numbers they are involved in and what snack the parent is bringing. There is also a map to the recital venue, what time they should arrive, what time the recital starts and any special instructions on dress code.
- My students always look forward to the social time after the recital. At Christmas, I make a special piano cake for the students (see picture at the end of the blog) and the parents help by bringing refreshments. We always take a class picture for the recital history book! The social time gives me an opportunity to visit with the families and friends of the students. (Note...my recital history book contains all the programs and class pictures from previous recitals. It's on display at every recital. Students love to look back and see the progress they have made. They also love to see how they have changed!)
- I find it works well to have the students sitting at the front of the hall. It helps to have numbers on the student's seats. That way, the students know where to sit and what order they play in. This facilitates the flow of the program. I used a free musical font called Onpu to print the numbers seen below. I'll include a link to this font. I downloaded the font and printed the numbers directly onto coloured card stock. Then I had the cards lamented. You can set custom margins to print onto 3x4" cards.

I've included a link for my Blueprint for a Perfect Recital planning sheet. I follow this blueprint every time I'm working on a recital. I've uploaded the Word version of my file so you can modify it for your particular circumstances.
I've also included a link for my Recital Planning Charts. This Excel file has 4 different charts (see the buttons across the bottom of the Excel screen). I've left some of my information on the files from my upcoming recital to show how I use the four different charts. This can be easily erased. Here are the charts that I use to organize my recital:
-
Initial Planning Chart: This chart is used for picking the pieces and planning the program. All the students are listed in the order that I teach them in the week. They are only allowed to play one regular piece each. I update the information on the computer and print a new sheet every week. I can keep track of progress, make necessary changes and work at timing the recital. The special numbers are listed at the end (orange). Seven to ten special numbers per recital works well. These numbers add interest to the program and give keen students a chance to do something else.
-
Program Planning Chart: This chart is used to place the pieces in order for the program. Special numbers are listed in dark print and are placed throughout the program as surprises! This chart has a place for seat numbers. I can also use this chart to take attendance on the day of the concert and there is a column for final timing of the program.
-
Final Program Planning Chart: Just before the recital, all the information from the 2nd sheet is copied onto the 3rd sheet. There are no lines on this chart, so you use it to generate the final program. You can then have the program printed on special paper.
-
Refreshment Sign-up Chart: This is a sign-up sheet for refreshments. It's posted on my board in the waiting room about 2 weeks before the recital.
Remember that the recital should be fun for both students and parents. Many students have told me that both the Christmas recital and the June recital are the highlights of the year. Very few students miss these events and I rarely have a problem with students leaving early. They look forward to sharing their music with their families and with each other in a relaxed and enjoyable environment. And they especially look forward to the treats afterwards!
Have fun planning "The Perfect Recital"!
My Piano Cake
~~~~~~~~~~~~~~~~
~~~~~~~~~~~~
 Master classes are a great way to help students to feel more comfortable performing in a relaxed and informal setting.
My students have been very busy over the last few weeks preparing for our next master class this coming Monday. See below for the chart that I will be using for this master class. There is also a free download of the Excel file that I use for organizing my master classes.
Typically, a master class is a group class where students come together to play for each other and their teacher. It's a wonderful way to foster a sense of community among students in a studio. Students are able to associate with others who share their love of music. Many times I've had a student come for a lesson after a master class asking to play a piece that they have heard some one else play! It also gives younger students a chance to feel comfortable performing in front of others before playing in a larger recital.
A master class is also a great way for a teacher to assess the performance readiness of a piece. It gives students a chance to 'test' their memory. This is especially helpful if they are preparing for exams, festival classes or auditions. I usually have 3 regular master classes a year—one in the fall, one in the winter and one in the spring. This is over and above the two more formal recitals we hold during the year.
Here are some ideas for a successful master class:
- Don't make the class too long. My master classes are usually around 90 minutes. This gives about an hour for performances and teacher comments with some time left at the end of the class for the students to socialize. It's a good idea to mix up the longer songs and the shorter songs... don't save all the longs pieces for last!
- It's always important to have refreshments at the end. The parents can take turns bringing snacks for the students.
- One piece per student is probably enough. Try not to have too many long songs, especially if there are younger students in the class. I try to have the students perform a variety of music, including some popular selections.
- Students can work on 'The 12 Points of Performance'. These points are found on the back of our Sight Reading Cards and at the front of The Student Music Organizer. Students can practice what to do from the time they stand up to perform until they sit back down. These points really help students maintain focus throughout a performance.
- I don't make memorization mandatory, but I do encourage it. Then they can choose to try it from memory or not. Many times, they do not even look at the score! This way, they don't have to play from memory until they are feeling ready to do so.
- Make sure you start and end on time. Parents especially appreciate this!
- Parents are generally not invited to attend. A master class should be more informal than a recital. That way the students feel as if this is their special time with the teacher.
- Make the class fun by having a theme night. The photo above shows one of my fall master classes. We had Musical Costume Party! Students could dress in black and white to match the piano keys or they could dress in a costume to match their piece!
- In the winter, you could have a musical pyjama party. The younger students really like to bring their stuffed animals as an audience!
- I like to have a class on 'Music Monday' (held on the first Monday in May). This is an official event in Canada, where it started 10 years ago. There are now similar events in the US, Australia, Britain and Hungary. Students are encouraged to "fill the skies with music". This year, Music Monday is scheduled for May 5th. You can even register your master class as an official event on the Music Monday website. My students love to feel as if they are a part of this amazing event!
- Extra Master Classes can be scheduled during the year for students doing exams. That way, they have an opportunity to play their pieces as a concert group. I also have them play some of their technique... we have a Scale-a-thon. I call a student's name and a scale or chord and they have to run up to the piano and play it! The reward for playing well is an M&M. By the end of the game, they have a bag full!
Master classes can be a fun and effective way to help students share the joy of music.


 This year in my studio, I decided to try something completely different. This past spring, I hosted a ‘Music Enrichment Day’ for my students. This was not a competition, but rather like having a mini lesson with another teacher. Each student had the opportunity to perform two to four songs while I sat in the waiting area the entire morning so that I could encourage them and keep things running smoothly. Memorization was not mandatory, but it was encouraged. Our guest teacher was my friend and colleague, Frances Balodis.