It's September...time for music lessons to start again. I'm sure that many of us have new students who are just starting piano lessons. It's so important that their first lesson be a very positive and enjoyable experience. I'd like to share with you a fun game that I play at their first piano lesson. My younger students really enjoy this activity and they are learning so much while they are having fun. I call this game "Who Lives in the Doghouse?"
Here's how it works:
Using the right hand, have the student tuck their thumb, 4th and 5th fingers together so that you only have fingers 2 and 3 showing (like 2 stork legs)!
Have them play all the '2-black keys' on the piano with fingers 2 and 3. Start on the right side of the piano and go to the left.
As they play, ask them what they notice about the sound (the notes start high and get lower and lower). Remind them to drop the arm weight forward into the keys as they play so they make a nice sound.
When they have finished playing the 2-black keys, have them tuck the thumb and 5th finger behind fingers 2,3 and 4 on the left hand and have them use those fingers to play all the '3-black keys', starting on the left side of the keyboard and going to the right. Again, have them listen to the sounds of the notes and tell you what they notice.
The next step is to make 7 ‘doghouses’! They especially love this part! Take 7 various coloured 3x5" file cards and folding them in half. I have the student decorate these with dog stickers. Place a doghouse over each of the '2-black keys’ on the keyboard.
At this point, I ask the question…."Who lives in the doghouse?” And they answer - "The dog, of course!!"
I then tell them that the white key between the 2-black keys is called a D.....D for Dog!
In the right hand, have them place their thumb behind the first joint of the 3rd finger and play all the 'Dogs' on the piano. Start with the low, grouchy dogs and play up to the high dogs!
The thumb behind the 3rd finger helps to support the joint so that it doesn’t collapse. It also gives a nice, rounded hand position and helps them to feel the arm weight drop into the keys. Take care that they don’t raise the 5th finger as they play.
Next I ask ”OK….what note comes BEFORE D in the alphabet?" They usually have to think about this one for a bit!!
Finally they say C. I tell them that the note to the left of D is the Cat (C)! He lives under the dog house because the dog won't let him inside!! Have them play all the Cat's on the keyboard.
"Now...what note comes AFTER D”? “That’s easy….E!” “E is for Elephant. He won't fit inside the doghouse, so he lives on top of it!!” Have them play all the E's on the piano.
You can alternate between starting high or starting low on the piano.
I call the "3-Black keys" the big house! “What note comes before C?” “B is for Boy. The boy lives on the roof of the big house because he feeds the cat!”
The rest of the game goes like this.....Father (F) went to Africa and came back with an elephant! He lives in the basement of the big house so he can feed the elephant!
The Grandma (G) lives downstairs in the big house because she doesn’t like the stairs. However, the Aunt (A) lives upstairs.
I usually embellish the story as we go along! They like to add to the story as well. Students also love to ‘practice’ their doghouses at home!
My beginner student came for her second lesson this morning. Her mother said that she absolutely LOVED the doghouses! She had placed cat stickers on the back side of the cards. When I asked her why, she said "Because the cat lives beside the doghouse!"
I play this game with my students for several lessons until they have a solid knowledge of the keys on the piano. My older students tell me they still remember their first piano lesson when we played this game! It’s a great way to make the first lesson special. Have fun making doghouses!
Summer is a great time to relax and enjoy the nice weather. But for music teachers, summer is also the time to prepare for the fall. There is always so much to do before regular lessons resume. Organization is the key to having a well-run business. With a little planning ahead of time, you can sail into September knowing that everything is ready to go! That way you will spend less time worrying about all the things that you have to do and more time enjoying the time off. I would like to share with you a few great organizational ideas that have worked for me.
One of the first things that I do when preparing for the upcoming season is to work on my Yearly Studio Calendar. I have an Excel chart that I use to generate a one-page Calendar for parents and students. I can use the same chart each year. I just change the dates and add all the important information that I feel my students and parents need to know for the whole year (i.e. master classes, recitals, festivals, holidays, deadlines, exams, upcoming events, vacations, etc). In late August, I e-mail this to all of my parents along with a reminder of their first lesson date and time. I place a copy of the Calendar on the bulletin board in my waiting room. I also tape a copy in the back of each student’s Organizer so that I can refer to it at their lesson throughout the year and highlight any upcoming dates. I've included a link to my original file for the Yearly Studio Calendar in this post. That way, you can download it and change the information to suit your own teaching year.
The iPad is an amazing tool. For me, it was definitely worth the investment. (See previous Blog Post called 'The iPad and the Music Teacher'). The Calendar App is one of the best studio organization tools on the iPad. I love how it backs up automatically to the cloud so that I don’t have to worry about losing my information. Entries can be colour coded to keep track of lessons that have been changed or missed. You can also write notes pertaining to a lesson directly on the individual entires. The search function is fantastic. In an instant, I can see all of the lessons for one particular student for the entire year. I also find the Contacts App very useful for keeping track of all student information. My iPad has revolutionized the way that I organize my business. Here's a link to help you get started. This article will help you with the basics of using the calendar App.
I have a very handy ‘Performance Tracking Chart’ (Excel File) that I use to organize all student performances throughout the year. Once I’ve completed my yearly calendar, I set up this chart with student's names and dates of all master classes, recitals and other performances. Then I print it and put it on a clip board that I keep beside me in the studio. I can use this chart for performance planning throughout the year. In September, the first thing we do is pick a Master Class piece (for the end of October) and a Christmas recital piece. I will also use this to help plan performances for exam preparation. I can keep track of all performance pieces for all students throughout the year on these sheets. I find it easier to work with a paper copy in the studio. I can fill it in as I’m teaching. Every two weeks or so, I will update the chart on the computer with any changes or additions and print it again. This gives me a running list of all performance pieces being worked on by my students at all times. I also list the students' pieces in their own Organizer. There is a column in the chart for keeping track of the total playing time for pieces which is useful for timing recitals and Master Classes. Here is the original file of my ‘Performance Tracking Chart’. This will allow you to input the names, dates and events to suit your own studio.
The Student Music Organizer is another great time-saving teaching tool. Each September, my students start a brand new book. The book is written on 8 1/2 x 11” paper so there is lots of room for writing notes. It is is designed to last for an entire year of lessons so you don't have to buy 2 or 3 smaller notebooks. At the end of the year, you will have a complete record of what has been done for the entire year. Parents love it as well. If they have a question, I can tell them to check the Organizer! Here are some of the sections included in this great resource:
Goal Setting Section — I do this on the first lesson so that we know how to plan for the year.
Favourite Piece Section — This is very helpful when planning recitals, festivals or exams.
Exam Planning — for students doing an exam in the upcoming year, we start planning right away.
Practice Planning — after we have set goals for the year, we then decide together how much time they will need to practice each week to attain these goals. This time can then be broken down into smaller sections so they know how long to spend on each aspect i.e. pieces, technique, sight reading
The Organizer contains 35 Assignment Pages. These sheets can be filled out during the lesson. Each page contains a chart for recording weekly practice. There is also manuscript across the bottom and the pages are numbered so you can refer back to a scale or exercise assigned earlier in the year.
The back of the book contains lots and lots of valuable reference material. You will find extra manuscript paper, a composer chart, summary sheets for musical time periods (Baroque, Classical, Romantic, Impressionism and Modern), music dictionaries, basic music theory reference guides and a wonderful comparative fingering chart for keyboard instruments.
♫ A SPECIAL NOTE ♫…The Student Music Organizer Website is having a fantastic 15/15 sale! For the entire month of August, teachers will receive 15% off of their entire order if they order 15 organizers or more. Use the discount code AUGUST at checkout to take advantage of this terrific deal.
Have a great rest-of-the summer AND have fun getting organized for September.
♥︎ Remember, Great Music Comes from the Heart ♥︎
♥︎ Remember - Great Music Comes From the Heart ♥︎
Photo credit: "Over the River and Through the Woods" by garlandcannon
All Cows Eat Grass.....this is one of the many popular sentences used to teach note reading on the grand staff. But is this the most effective way for students to become the best sight readers?
Sight-reading is a key. It can open the door to the amazing world of music. To be a good sight reader, a student must first learn how to read the notes. It is important to remember that music is a language. When a child is first learning to read a language, they have to start by learning the alphabet. Then they learn how to read words, sentences and eventually books, using those letters. It is the same for music and it takes a good deal of time and effort.
Sight-reading is a gift. I often tell my students that sight reading is probably one of the greatest gifts that I can give to them. My hope for my students is that they will continue to play the piano long after they have finished taking lessons. Many times I have heard adults regretfully admit that they took lessons when they were young but can no longer play.
Sight-reading is a skill. Acquiring this skill begins with the very first lesson. Here are a few ideas and strategies that have worked for me as I train my students to be the best sight readers they can be.
Start note reading at the very first lesson. I prefer to teach the actual notes rather than having students read general positions on the staff and then switching them to the actual notes later on.
There are two main methods that I have used for teaching note reading. The first method is to use acronyms and words (mnemonics) to memorize where the notes are on the Grand Staff. The spaces on the Treble Staff spell 'FACE' and the lines are 'Every Good Boy Deserves Fudge (Fun)’ or'Empty Garbage Before Dad Freaks'. The Bass Staff spaces are 'All Cows Eat Grass'and the lines are 'Good Boys Deserve Fudge (Fun) Always’ or ‘Great Big Dogs Find Animals’. You can also make up your own acronyms. Students generally learn to read quite quickly using this method. However, my experience has been that they can become dependent on these short cuts. It takes much longer to be able to read the notes without saying the sentences, especially in the bass clef. I use this method if the students are not able to learn any other way.
My preferred method is sometimes called The Symmetrical 'C' Approach. I find that this method takes longer but achieves better results in the end. TheSymmetrical 'C' Approach uses landmark notes throughout the Grand Staff. I call them Hitching Posts. Have students memorize these notes right away. This gives the students something to 'hang on to'. Once they have their Hitching Posts memorized, they can figure out other notes around them.
The Grand Staff is like a Mirror. Have them memorize the position of Middle C in the middle of both staves. This is the first Hitching Post. I tell my students that the staff is also like a Ladder....you have to be able to read the notes forwards going up and backwards going down. Have them say the letters ABCDEFG as fast as they can. Then try saying the letters backwards just as quickly...GFEDCBA! Students love trying to see how quickly they can say the letters backwards!
After Middle C, I teach the Hitching Posts G and F. In the Treble Staff, G is two lines up from 'Middle C’. The Treble Clef can also be called a 'G Clef' because G is in the middle of the large swirl. And if you stretch your imagination, the treble clef kind of looks like a cursive G. In the Bass Staff, F is 2 lines down from ‘Middle C’. The Bass Clef is also called an 'F Clef'. The big dot of the Bass Clef sits on this F and the two smaller dots are in the spaces on either side of it. If you really stretch your imagination and add two small lines from the small dots back to the bass clef, it kind of looks like an F!
When I feel that the students are ready, I teach that the next Hitching Posts are 'Treble C' (3 spaces up from Middle C) and 'Bass C' (3 spaces down from Middle C). Students can memorize these notes, then figure the notes out around them.
Later on, you can teach that 'High C' (2 ledger lines above the Treble Staff) and 'Low C' (2 ledger lines below the Bass Staff) are also Hitching Posts. Having these notes memorized helps students read ledger lines.
Each Assignment Page in The Student Music Organizer has manuscript across the bottom. For beginner students, every week I write notes on the Grand Staff for them name. I use this to review the all the notes they have learned so far. This becomes part of their theory assignment each week and I will continue to give them notes until they know them fluently. Another great idea is to have them play the notes with their thumb behind their middle finger (RH or LH) while naming the notes out loud. They can do this all week as part of their practice and then add the letter names on the page just before the lesson.
Flash Cards can be a very effective tool for students who are just learning to read notes. Have them practice the flash cards at home with a parent or sibling.
I have the students start in 3 or 4 beginner books and I use the Dozen a Day books as well. I want them to read lots and lots of music....I call it 'eating music'. The more they read, the quicker they will learn to sight-read. Here are some of the beginner resources that I have used successfully:
Progressive Piano Method for Young Beginners - Book 1 (Gary Turner & Andrew Scott). This book has a wonderful accompaniment CD that can be used at the very first lesson. It also teaches the right hand first and then the left hand in C position.
Piano Adventures - Book 1: Lesson Book. You can also use the Technique & Artistry, Performance, Popular and Gold Star Performance. I find that these books work well after students have completed the initial beginner books.
If you have any favourite beginner books that you use, please feel free to share these in the comments below.
Sight-reading is a skill that takes time to acquire. But it is well worth the effort.
♥︎ Remember.....Great Music Comes from the Heart ♥︎
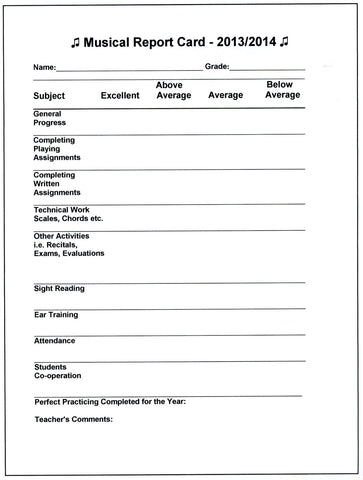
The musical year is almost over.....time to look back and see what has been accomplished. My students really look forward to receiving their Musical Report Cards. This has been a tradition in my studio for many years.
A musical report card is a great way to give students a summary of what they have accomplished over the past year. It's also good for the parents to see the progress that their child has made.
Here are some ideas for using Musical Report Cards in your studio:
Try to make the report card as positive as possible. Encourage, encourage, encourage!! Every student can usually receive an excellent grade in at least one area i.e. attendance, cooperation etc.
I find it best to grade as excellent, above average etc. rather than give actual marks or A's, B's etc.
I have a place on the report card to check if the student is what I call a "Perfect Practicer". (I will talk more about this program in a future blog post).
I always write a few comments at the bottom of the report card. I usually include one or two areas that the student could improve on next year.
I list all recitals, exams, master classes, auditions etc that the student has been part of throughout the year. That way, the report card becomes a summary of their musical accomplishments for the entire year. Parents especially appreciate this.
The report card also gives the teacher an opportunity to summarize and review the entire year with the student at their last lesson. You could review their goals for the past year to see if they have met them. It's also a great time to start planning goals for next year.
I have included the original file for the Musical Report Card. You can use my design or personalize it for your own studio. You can easily add your studio logo or header at the top of the report card.
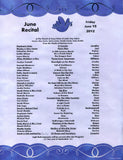
A Fond Farewell
June is also the time when we say goodbye to some of our students. I would like to recognize the accomplishments of two of my students.
The first student has been with me since 2007. She was a transfer student at the Grade 5 level. She completed her RCM Grade 9 piano with me last year with First Class Honours. This year, she has also completed her Basic, Intermediate and Advanced Harmony and her Basic History with Joe Ringhofer (Phoenix Conservatory). I'm very pleased that she has been accepted into the music program as a piano major at a well-known University in Ontario. I wish her all the best in her future.
Here is a video of her performing a beautiful piece entitled Monarchs from the Isla Vista Suite by Canadian Composer Martha Duncan. A big thanks to Martha for permission to post this performance. This piece is on the Grade 9 RCM list.
The other student that I would like to recognize started with me as a beginner when he was 10 years old. He also completed his Grade 9 piano last year (First Class Honours with Distinction). He is pursuing a career in Music Ministry and has been accepted into the music program at a well-known Bible College in the US.
I have included a video of him performing his amazing recital song—Prelude in c#- by Rachmaninoff.
Both of these students are amazing musicians and I will miss them.
Maintaining a piece for performance is a lot like mountain climbing.....I tell my students this all the time.
It's also very much like trying to tame a wild horse!!
This is the time of year when students are busy preparing for exams or recitals. They work very hard to learn and memorize a piece and get it up to tempo. However, sometimes students struggle with keeping that piece at performance level. The faster the speed of the piece, the harder this is. And so we talk about mountain climbing and wild horses.....
Having the piece ready to go is like finally making it to the top of the mountain. But what happens then? If you are not very careful, that piece will start to slide down the other side of the mountain! Jelly Fingers will set in!! You need to get out the musical ropes and pull that piece back up to the top of the mountain.
What are the ropes, you ask? Why, the metronome, of course!
So what does all of this have to do with wild horses? If a student practices a piece over and over again at a fast pace, that piece can turn into what I call a 'wild horse'. We talk about that horse galloping across the field, totally out of control! What we need are reins so that we can get that horse under control.
And what do the reins represent? You guessed it.....the metronome!
You need to control the music....you can't let the music control you!!
The metronome should be your best friend. I encourage my students to name their metronome.....I call mine George V!! I've gone through a few metronomes in my time!
George V is a much more sophisticated model than his predecessors. I LOVE this version (Korg KDM-2). I especially love the middle button on top. I can tap along with a student and know exactly what speed they are playing. I can also tap the exact speed that I would like for a piece and it will tell me instantly what that speed is. And unlike a traditional metronome, it goes up to 256 (which I actually used this week with a student!)
This past January, I had 3 students do Royal Conservatory of Music exams.....two Grade 7's and one Grade 8. All of them did quite well.....one received First Class Honours and the other two First Class Honours with Distinction. I also had two Grade 10 students audition for University and College programs. This June, I have students doing exams for Grade 1, two Grade 4's and Grade 5. For each student, the challenge is the same....how to maintain the faster pieces.
Here are some effective ideas that I have used with my students:
Preparing to maintain a piece starts on the very first day the piece is introduced. I work with the student to divide the piece into logical sections, according to phrases and form. (I will talk more about this in a future blog post). I label these sections with capital letters and circle the letters. If there are more than 26 sections, we use double letters. I also have the students figure out the basic key signature of each section, making special note of sections that modulate to a different key. If the piece is in a certain form, then we label these sections as well. i.e. Exposition, Development & Recapitulation.
Draw a box around any tricky areas that needs extra practice and label these as Box #1, Box #2 etc. These should be practiced separately until they are fluent.
Learn the piece in small sections, using the metronome as soon as possible. Consistent metronome practice helps to keep the piece in control. Learn it correctly the first time....it's so much easier than having to fix things later. Of course the rhythm and notes are important. However, also pay special attention to all the details such as fingering, articulation, phrases, rests and dynamics. Learn one section at a time. You can add more sections once you have mastered the first one.
Once the piece has been learned correctly, then you can memorize it in small sections, preferably hands separately. Be able to start playing at any section. This gives you safety nets all the way through the piece. You can also compare sections to see which ones are the same and which ones are different.
My students love to play the musical card game. I have a set of file cards with letters which correspond to the sections in their piece. I shuffle the cards and hold them up, one at a time. They love playing the mixed up version of their piece!! For an extra challenge, ask for the left hand only!!
Always have a maintenance speed and work at the slow speed several times before attempting allowing yourself to it up to speed. Four times slow and once fast works well! Exaggerate the arm motions at the slow speed.Be very careful not to over practice at the fast speed.
Remember....Slow practice is really fast practice in slow motion!
Putting a song on a shelf is a good strategy for maintaining a song. I actually draw a little shelf on the student's lesson page in The Student Music Organizer. I put it right underneath the lesson practice chart. Putting a piece on a shelf means that we leave the piece and don't play it for a while. This can also be called plateau learning. Then, when we revisit the piece, we can take it to the next level!
Table practice is a good way to maintain finger strength and articulation. Play the piece away from the piano on a flat surface. It helps to play with a little 'bite' in the ends of the fingers, using correct arm motion.
Another valuable technique is to "mind play" your piece. Find a quiet place away from the piano. Read the score as you would a book, while you 'listen' to the music and imagine yourself playing the notes. Observe and make note of all articulation and dynamics. This can also be done in sections. It is also a great way to reinforce memory.
One of my students is working on a piece called Intrada by Graupner. It is her Baroque piece (List A) and she is doing it for a Grade 5 exam later on this month. Click to see how I divided it into sections and prepared it for her to learn. It is now memorized hands separately in sections. She played it for me at her lesson last week and it was quite good...just about ready to go. But she doesn't play her exam for a few weeks. So we go into maintenance mode and we talk about mountain climbing and wild horses!!
Here are a few of the pieces that my students have maintained or are continuing to maintain for exams, auditions and recitals this year.
Prelude & Fugue in E+ (Bach) Grade 10
Prelude in c#- (Rachmaninoff)
Sonata in C+ K330 1st movement (Mozart) Grade 9
Etude in c- Op.29 #7 (Bertini) Grade 7
Suite #8 in G+ HWV 441 IV: Aria (Handel) Grade 7
Sonatina in C+ Op. 55 #31st Movement (Kuhlau) Grade 7
Sonatina in C+ Op. 36 #3 1st Movement (Clementi) Grade 7
Suite #1 in D+ VIII: Gigue (Krebs) Grade 7
Wound Up (Norton) Grade 7
Intrada in C+ (Graupner) Grade 5
March of the Terrible Trolls (Niamath) Grade 1
Remember
You need to control the music....you can't let the music control you!!
and
Slow practice is really fast practice in slow motion!
It's May and many music teachers are busy planning for their year-end recital. It can be a very busy and stressful time of the year. Along with the recital planning, there are also student exams plus preparing for next fall. I would like to share some of the effective ideas that I have used for planning, organizing and preparing for "The Perfect Recital".
Start planning early. Finding the best piece for each student takes time. They need time to prepare and hopefully, memorize their song. It's better to have the song up early and put it on a shelf for a few weeks then to be rushing at the last minute.
Once a piece is picked, don't let anyone else play that song. Students love having their own 'special' song. Sometimes they even pick their song for the Christmas recital before the summer break!!
Take care to choose pieces that showcase the student's strengths. Also keep in mind the level of difficulty. Try to encourage them to choose something that is a challenge but that they can reasonably perfect for the recital. It's so important that they feel good about their performance.
Timing is essential for a successful recital. The perfect length for a 'father friendly' recital is about 60-75 minutes. As a rule of thumb, each performance should not exceed five minutes. Of course, this also depends upon how many students are performing. Longer songs can be performed in a master class setting. If students are doing a piece that can be modified (i.e. a popular piece), then help them come up with an arrangement of the piece that is not too long, but will still showcases their playing. This is also a valuable skill for them to work on!
Make sure that the students are well prepared. That way, the program will flow well. I don't require that they play from memory unless they are preparing for an exam or audition. However they will play better and with more confidence if their song is memorized. We work at memorizing the pieces in small sections, preferably hands separately! Then they can chose to use the music or not, depending on their comfort level. Some take the book up with them and never look at it! This helps to take the stress out of performing.
Try to have a variety of fast and slow songs. Make sure that there are not too many slow songs in a row. It's also good to have a mixture of musical styles including classical and popular pieces.
Spice up the program with a few special numbers. These pieces should be spaced evenly throughout the program. It's a good idea to list the performers and the piece on the program, but I like to surprise the audience by not giving the details of the performance. There is no need to have them announce their pieces at the recital if there is a program. This also saves time. Make sure each student has a copy of the program.
Pool your resources by involving musical parents or siblings. Maybe some of your students sing or play other instruments. A small choir or vocal ensemble is a fun addition. Try adding duets and trios. The special numbers for my upcoming June recital include two trios, two regular duets (one with a CD backtrack), one piano/harp duet and one piano/organ duet. We also have a student playing a harp solo and a parent playing accordion.
It's important to keep parents in the loop when it comes to recital planning. I send reminders via e-mail at regular intervals. I also send an information sheet to each family about a week before the recital. This includes important information such as the student's seat number, the piece they are playing, any special numbers they are involved in and what snack the parent is bringing. There is also a map to the recital venue, what time they should arrive, what time the recital starts and any special instructions on dress code.
My students always look forward to the social time after the recital. At Christmas, I make a special piano cake for the students (see picture at the end of the blog) and the parents help by bringing refreshments. We always take a class picture for the recital history book! The social time gives me an opportunity to visit with the families and friends of the students. (Note...my recital history book contains all the programs and class pictures from previous recitals. It's on display at every recital. Students love to look back and see the progress they have made. They also love to see how they have changed!)
I find it works well to have the students sitting at the front of the hall. It helps to have numbers on the student's seats. That way, the students know where to sit and what order they play in. This facilitates the flow of the program. I used a free musical font called Onpu to print the numbers seen below. I'll include a link to this font. I downloaded the font and printed the numbers directly onto coloured card stock. Then I had the cards lamented. You can set custom margins to print onto 3x4" cards.
I've included a link for my Blueprint for a Perfect Recital planning sheet. I follow this blueprint every time I'm working on a recital. I've uploaded the Word version of my file so you can modify it for your particular circumstances.
I've also included a link for my Recital Planning Charts. This Excel file has 4 different charts (see the buttons across the bottom of the Excel screen). I've left some of my information on the files from my upcoming recital to show how I use the four different charts. This can be easily erased. Here are the charts that I use to organize my recital:
Initial Planning Chart: This chart is used for picking the pieces and planning the program. All the students are listed in the order that I teach them in the week. They are only allowed to play one regular piece each. I update the information on the computer and print a new sheet every week. I can keep track of progress, make necessary changes and work at timing the recital. The special numbers are listed at the end (orange). Seven to ten special numbers per recital works well. These numbers add interest to the program and give keen students a chance to do something else.
Program Planning Chart: This chart is used to place the pieces in order for the program. Special numbers are listed in dark print and are placed throughout the program as surprises! This chart has a place for seat numbers. I can also use this chart to take attendance on the day of the concert and there is a column for final timing of the program.
Final Program Planning Chart: Just before the recital, all the information from the 2nd sheet is copied onto the 3rd sheet. There are no lines on this chart, so you use it to generate the final program. You can then have the program printed on special paper.
Refreshment Sign-up Chart: This is a sign-up sheet for refreshments. It's posted on my board in the waiting room about 2 weeks before the recital.
Remember that the recital should be fun for both students and parents. Many students have told me that both the Christmas recital and the June recital are the highlights of the year. Very few students miss these events and I rarely have a problem with students leaving early. They look forward to sharing their music with their families and with each other in a relaxed and enjoyable environment. And they especially look forward to the treats afterwards!
I have told my students many times that lots of people can play the notes but it's much harder to play the music BEHIND the notes. And that's the question that I always ask them.....can you find the MUSIC hiding in the notes?
To explain, I want to tell the story of one of my students....I'll call her Kate. She is 10 years old and in Grade 2 piano. Last month, we were working on a piece called The Keepsake Mill from A Child's Garden of Verses by Chee-Hwa Tan. She was getting the notes, the counting, the fingering....all of the basic elements were there. But the music was missing! So I asked her the same question.....How can you find the music hiding in the notes?
I played it for her 2 ways. First, I played it with the correct notes and timing, but no feeling. Then I played it musically. "I can hear the difference", she said, "But I don't think I can do that!"
"Yes, you can", I said, "but first I have to share some musical secrets with you". I started asking her a few questions and each time, she would try it again:
Do you know what a phrase is? It's a musical sentence. Can you identify and play the phrases alone in the right hand? Can you think of words for the phrases? Can you sing the words as you play?
Can you breathe after each sentence? Use your arms. Feel as if you are taking a breath with your arms.
The left hand is in broken chords.....can you see that? Play the accompaniment alone. Now can you play the left hand in solid chords? Can you name the chords? Can you hear the different colours or harmonies?
Can you play the melody alone in the right hand, phrase by phrase?
Project the melody. I want beautiful, round, fat notes on top. Send those notes across the room. Ping the notes so that they travel out the window and across the road.
Stroke those notes gently like you would stroke a little cat.
Kate's idea was to gently roll a basketball over the notes....now she was thinking!
Now....what is balance? Basically it means that you play the right hand phrases louder than the left hand accompaniment. The right hand is the star and the left hand is the orchestra.
First try to shadow play....play the right hand projected melody and only pretend to play the accompaniment? Touch the notes in the left hand but don't depress the keys.
Now try playing the accompaniment in the left hand as written along with the projected melody on top.
Can you shape the melody (like a rainbow over the water) while projecting the melody over the accompaniment? (I know, I ask for a lot!)
I would play it for her so she could hear the music. Then she would try again. It took several tries and then she said excitedly....."I hear it!! I can hear the difference! I've found the MUSIC!" "That's after just a few minutes of trying". I said. "Imagine how much better it will be after you practice it that way that all week".
She came back for her next lesson and she was very proud of herself. The piece had improved dramatically!
"Now, let's take it a step farther." I said. "Here are some more ideas for finding the music hiding in the notes":
What is a Keepsake Mill? Can we find a picture of the keepsake mill?
What was the purpose of a mill? What was the purpose of the water wheel? (having a computer or iPad nearby is very handy because you can instantly look up what you need).
What did the composer do in the music to paint a picture of the Keepsake Mill?
Can you see the wheel turning round and round and round? It never stops....it's almost hypnotic. Can you hear it? Can you see the dark water swirling in the pond below? Can you hear it? Can you feel the spray of the water on your face? Can you smell the water and the wood?
Now.....have that picture in your mind when you play this piece....make the music come alive....paint the picture with your notes and send it out to your listener.....send it to me and let me see it too!! Play it with balance and phrasing and shaping and FEELING!
There was such a difference. The song was totally different. "I LOVE this song", she said!
Music to my ears!! Kate was no longer just playing the notes. She had unlocked the magic and had found the music hiding in the notes!
Over the borders, a sin without pardon, Breaking the branches and crawling below, Out through the breach in the wall of the garden, Down by the banks of the river we go.
Here is a mill with the humming of thunder, Here is the weir with the wonder of foam, Here is the sluice with the race running under – Marvelous places, though handy to home!
Sounds of the village grow stiller and stiller, Stiller the note of the birds on the hill; Dusty and dim are the eyes of the miller, Deaf are his ears with the moil of the mill.
Years may go by, and the wheel in the river Wheel as it wheels for us, children, to-day, Wheel and keep roaring and foaming for ever Long after all of the boys are away.
Home for the Indies and home from the ocean, Heroes and soldiers we all will come home; Still we shall find the old mill wheel in motion, Turning and churning that river to foam.
You with the bean that I gave when we quarreled, I with your marble of Saturday last, Honoured and old and all gaily appareled, Here we shall meet and remember the past.
Last spring, I had an interesting experience with one of my students....I'll call him Lee. He came to his lesson one afternoon and he seemed very upset. He said "My teacher at school wants me to play The Cup Song for our class". I didn't think much of it. "Ask your teacher for the music. You can bring it next week and I'll help you learn it", I said and went on with his regular lesson.
The next week, Lee came for his lesson as usual. However, when he walked in the door, I knew something was wrong. "My teacher wants me to play The Cup Song", he said again. This time, he looked visibly upset. "OK" I said, "Did she give you the music?" I asked. He looked horrified!!! "That's the problem" he said, almost in tears. "She doesn't have any music. She told me to just figure it out!". More tears!
ABOUT FACE!! I quickly abandoned what I had planned to do for that lesson.
"OK" I said. "Where can we find this Cup Song?". I had never heard of it before! "It's from a movie." he said. "It's on Youtube. We sing it at school. My teacher said to say Pepsi instead of whiskey!". I had no idea what he was talking about but I was very interested to find out!!
"Well, let's look on YouTube and we'll see what we can do!"
I searched YouTube on the iPad and quickly found the song. I played it over several times and we listened to it together. Thankfully, it was in C+!! (Yes, I thought. I don't have to transpose it!!)
I explained to him that you don't always have to have music to play a piece. What a revelation!! He looked shocked and surprised at the same time! "Wow, that's cool", he exclaimed!
We turned to the manuscript paper at the back of The Student Music Organizer and I started teaching him how to figure out a melody by ear. Then we had an impromptu lesson on how to transcribe it! I showed him how to figure out the time signature. The melody was simple enough but the rhythm was quite tricky. By the end of the lesson, we had written out the melody for the song and he had something to practice for his teacher! It had been a great lesson and Lee went home smiling!
I called his mother in the middle of the week to see how he was doing with the song! "It's all we've heard", said his Mom!! "He plays it over and over and over!".
At his next lesson, I said to him, "We figured out the melody last week and you can play that. Now let's see if we can add some chords". Again, he was intrigued. I proceeded to teach him the basic chords in C+ (I, IV, V and vi). Then I showed him how these chords can be added to the melody. I told him to listen carefully so that he could figure out which chord would work for which notes. We worked through the song and added the chord symbols over the appropriate notes. It was another great lesson and Lee went home, ready to try the next step.
When he returned the following week, he could play the whole song. He was thrilled. Best of all, his school teacher was thrilled!! He ended up playing "The Cup Song" while his whole class sang and did the rhythm with cups. Then the class performed it at the Spring Concert for the entire school! The most important thing was that Lee felt great about what he had done. He had fun playing music with his friends. He was the hero of the class. Mission accomplished!
Here are some fun ideas on teaching basic ear training in a lesson:
Start with a familiar tune. Have the student figure out this tune by ear. Twinkle Twinkle Little Star works well.
The student could transcribe the melody on manuscript or just learn it by ear.
Then teach some basic chords (I, IV, V and VI).
Have the student figure out which chords go with the melody and where they change.
After that has been mastered, you could have them try some variations with the accompaniment.
Try some other 2 and 3-chord melodies i.e. Amazing Grace, Happy Birthday or Silent Night.
Have fun exploring with your students.
"The Cup Song"is also a great song for teaching rhythm. I found out that quite a few of my students knew this song AND they knew how to do the cup rhythm. I had another bright idea!!! Let's do this song for our final recital in June. The students worked well together and they came up with their own arrangement. The biggest challenge was keeping it in sync. They really had to learn to listen to each other and adjust. The above video was our final rehearsal before the recital .They did it perfectly for the concert AND Lee played it from memory! It was the highlight of the recital!!
The moral of this story: Always be ready to change a lesson plan to meet the needs of your students!
My next post will be: Can You Find the Music Hiding in the Notes?
Special Note:
I have just discovered a cool book which helps to teach rhythms while taking advantage of the cup "craze". It is called "Rhythm Cup Explorations" and it is published by Wendy Stevens. Her Website is called Composecreate.com. It's a reproducible resource, so you only have to buy it once for your studio!
It made me think of a story that I remember my mother reading to me when I was very young. I'm sure that everyone is familiar with the beloved children's book entitles "The Little Engine that Could" by Watty Piper (Published in 1954 by Platt & Monk. Illustrated by George & Doris Hauman). An early published version called, "The Story of the Engine that Thought it Could", appeared in the New York Tribune on April 8th, 1906, as part of a sermon by the Rev. Charles S. Wing.
Part of an early version goes as follows:
A little railroad engine was employed about a station yard for such work as it was built for, pulling a few cars on and off the switches. One morning it was waiting for the next call when a long train of freight-cars asked a large engine in the roundhouse to take it over the hill.
"I think I can," puffed the little locomotive, and put itself in front of the great heavy train. As it went on the little engine kept bravely puffing faster and faster, "I think I can, I think I can, I think I can."
As it neared the top of the grade, which had so discouraged the larger engines, it went more slowly. However, it still kept saying, "I—think—I—can, I—think—I—can." It reached the top by drawing on bravery and then went on down the grade, congratulating itself by saying, "I thought I could, I thought I could."
And then I began to think about how I could relate this story to the Power of Positive Thinking in everyday teaching.
Here are some positive ideas that have made a difference for me in my own studio:
Always greet a student pleasantly at each lesson. It's important to be ready for them and to give them your undivided attention.
Listen to them and make them feel that they are important. Everyone gets discouraged from time to time. Help them through that. Encourage, encourage, encourage! I always remember an old saying that my grandmother used to say to me: "You can catch more flies with honey than with vinegar"!! It's important to be positive at each and every lesson.
Have a studio motto and post it where parents and students can see it! Your motto should reflect your teaching philosophy. My studio motto is "Great Music Comes from the Heart".
New music helps! Talk to the parents, buy a new book with music that is at their level that they enjoy. Find out what moves them musically and let them play that as well as their other pieces.
Work to each students strengths. If a student has a great sense of rhythm and absolutely loves jazzy pieces, then let them play jazz! When I am picking a new piece for a student, I make sure that they feel as if they are part of the process. I usually give them a choice of 2 or 3 pieces that I think they will like. I'm always looking for that sparkle in their eyes when they hear something that they like. I want them to come back the next week and say "I LOVED that song"!!
If a piece is not working for a student after a few weeks, find something different that teaches the same concepts. They don't have to always play a minuet to learn balance, phrasing and tonal control. That's not to say that they shouldn't learn minuets!! However, lots of other pieces can also teach the same things. i.e. In Dreams (from Lord of the Rings) or Colors of the Wind (from Pocahontas).
Many popular pieces have very tricky syncopated rhythms.These pieces are great at helping students with their counting. Students love to play the jazz pieces of Christopher Norton. A lot of these pieces have backtracks that you can download from his website. They love playing with a band behind them! It is also a great way to teach them how to play with the beat!
Have them learn something different that no one else in the studio has played. That always makes them feel special. (see previous blog post entitled: "Spicing up your Studio with New Repertoire")
Have your students try to figure out a simple melody from a familiar pieces by ear (Twinkle Twinkle Little Star works well). Teach them some basic chords (I, IV and V) and then show them how to turn these chords into a simple accompaniments that they can work out on their own.
Teach them a 'new' scale like the Pentatonic or Whole Tone Scale. Then have them try composing a song of their own using one of these scales. You could also have them draw a picture or write a story for their piece. You could use the extra manuscript pages and extra notes pages in the back of The Student Music Organizer for this. They could then perform that piece at a recital or master class.
I always encourage my students to memorize their piece for a performance. They will play it much better if it is memorized. However, I do allow them to take their music up with them until they feel ready to play without the score. They need to feel comfortable playing without the music and that takes time for some students. I want them to have a positive experience and sometimes all they need is to have the music in front of them as a security blanket. Lots of times they don't even look at it! When they are ready, then they can try to perform from memory.
Each student handles the stress of performing in a different way. When I was young, I had the privilege of studying with an amazing teacher. Her name was Patricia Bloomfield Holt. She was a well-known Canadian composer and a respected Royal Conservatory of Music teacher and examiner for many years. However, at the time, I didn't know any of that. I knew her simply as Mrs. Holt. She was very strict, but I also knew that she cared about me and that she wanted the best for me. Most importantly, she didn't give up on me. And because of that, she changed the course of my life. I will always remember her saying that I was NEVER to say the word 'nervous" (she called it the 'N' word). Instead, we had to say that we were 'excited'. I remember lots of times being VERY excited!! But somehow, that change of mindset made it easier for me to perform.
This needlepoint hangs on the wall of my studio. It was a gift from a student.
My goal has always been to have my students learn to love music. Not all students will do exams or festivals. But all students can develop a love of music. When they have finished their formal lessons, I want them to be able to play this thing called the piano. I want them to have an appreciation for classical music, for pop and jazz and all kinds of music I want them to have something that they can enjoy and carry with them for the rest of their lives.
We, as music teachers, have the best job! We can introduce our students to the wonderful and amazing world of music. We can instill in our students a love of music that will last a lifetime. We can give them the gift of music. But to do this, it is important that we also have a positive attitude with our students. We need to patiently find ways to 'reach' them. Each student is different, with their own musical tastes and interests. We need to believe in them and teach each student at their own pace. We also need to give them opportunities to feel successful. As we approach each student in this way, we can help them to feel like that little engine....."I thought I could, I thought I could." or, even better: I knew I could, I knew I could!
Master classes are a great way to help students to feel more comfortable performing in a relaxed and informal setting.
My students have been very busy over the last few weeks preparing for our next master class this coming Monday. See below for the chart that I will be using for this master class. There is also a free download of the Excel file that I use for organizing my master classes.
Typically, a master class is a group class where students come together to play for each other and their teacher. It's a wonderful way to foster a sense of community among students in a studio. Students are able to associate with others who share their love of music. Many times I've had a student come for a lesson after a master class asking to play a piece that they have heard some one else play! It also gives younger students a chance to feel comfortable performing in front of others before playing in a larger recital.
A master class is also a great way for a teacher to assess the performance readiness of a piece. It gives students a chance to 'test' their memory. This is especially helpful if they are preparing for exams, festival classes or auditions. I usually have 3 regular master classes a year—one in the fall, one in the winter and one in the spring. This is over and above the two more formal recitals we hold during the year.
Here are some ideas for a successful master class:
Don't make the class too long. My master classes are usually around 90 minutes. This gives about an hour for performances and teacher comments with some time left at the end of the class for the students to socialize. It's a good idea to mix up the longer songs and the shorter songs... don't save all the longs pieces for last!
It's always important to have refreshments at the end. The parents can take turns bringing snacks for the students.
One piece per student is probably enough. Try not to have too many long songs, especially if there are younger students in the class. I try to have the students perform a variety of music, including some popular selections.
Students can work on 'The 12 Points of Performance'. These points are found on the back of our Sight Reading Cards and at the front of The Student Music Organizer. Students can practice what to do from the time they stand up to perform until they sit back down. These points really help students maintain focus throughout a performance.
I don't make memorization mandatory, but I do encourage it. Then they can choose to try it from memory or not. Many times, they do not even look at the score! This way, they don't have to play from memory until they are feeling ready to do so.
Make sure you start and end on time. Parents especially appreciate this!
Parents are generally not invited to attend. A master class should be more informal than a recital. That way the students feel as if this is their special time with the teacher.
Make the class fun by having a theme night. The photo above shows one of my fall master classes. We had Musical Costume Party! Students could dress in black and white to match the piano keys or they could dress in a costume to match their piece!
In the winter, you could have a musical pyjama party. The younger students really like to bring their stuffed animals as an audience!
I like to have a class on 'Music Monday' (held on the first Monday in May). This is an official event in Canada, where it started 10 years ago. There are now similar events in the US, Australia, Britain and Hungary. Students are encouraged to "fill the skies with music". This year, Music Monday is scheduled for May 5th. You can even register your master class as an official event on the Music Monday website. My students love to feel as if they are a part of this amazing event!
Extra Master Classes can be scheduled during the year for students doing exams. That way, they have an opportunity to play their pieces as a concert group. I also have them play some of their technique... we have a Scale-a-thon. I call a student's name and a scale or chord and they have to run up to the piano and play it! The reward for playing well is an M&M. By the end of the game, they have a bag full!
Master classes can be a fun and effective way to help students share the joy of music.